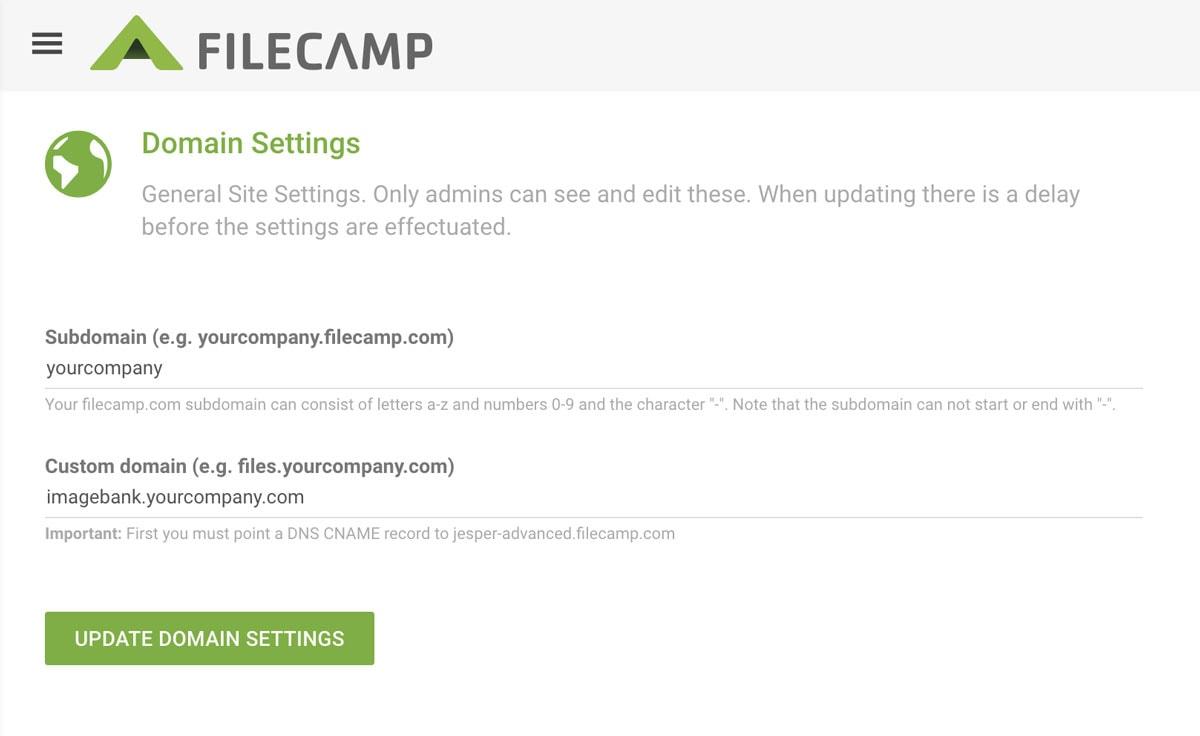
Domain Settings
Change your Filecamp subdomain or use a custom domain name with your Filecamp
Changing your Filecamp subdomain
When you start a Filecamp Trial or plan, a secure and unique site name (Filecamp subdomain) is created for your account, ex. https://yourcompany.filecamp.com. However, you can change your site name.
Changing your Site name:
- Login to your account as an Administrator.
- Go to Admin > Domain.
- Under Subdomain enter your new preferred site name.
- Click UPDATE DOMAIN SETTINGS.
- Log out, wait 5 minutes, and log back in to your new domain.
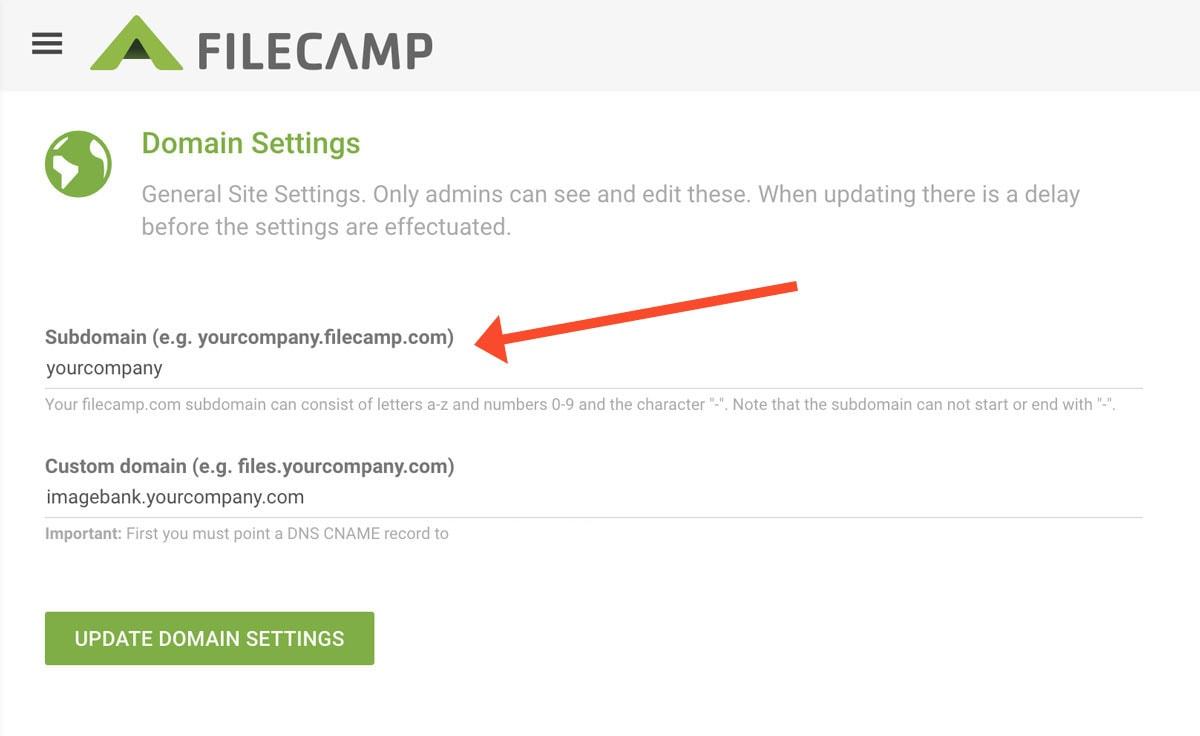
Notice: Changing your site name (subdomain) is a major DNS operation. Please allow 5-10 minutes before logging into your new URL to make sure the changes have been properly propagated in all regions. If it takes longer read this.
Use your own URL (Pro plan only)
With Filecamp, using your own domain name (ex., https://imagebank.yourcompany.com) is easy and can be configured in a few minutes. Doing so involves something called a CNAME record. But don't worry it's really quite simple.
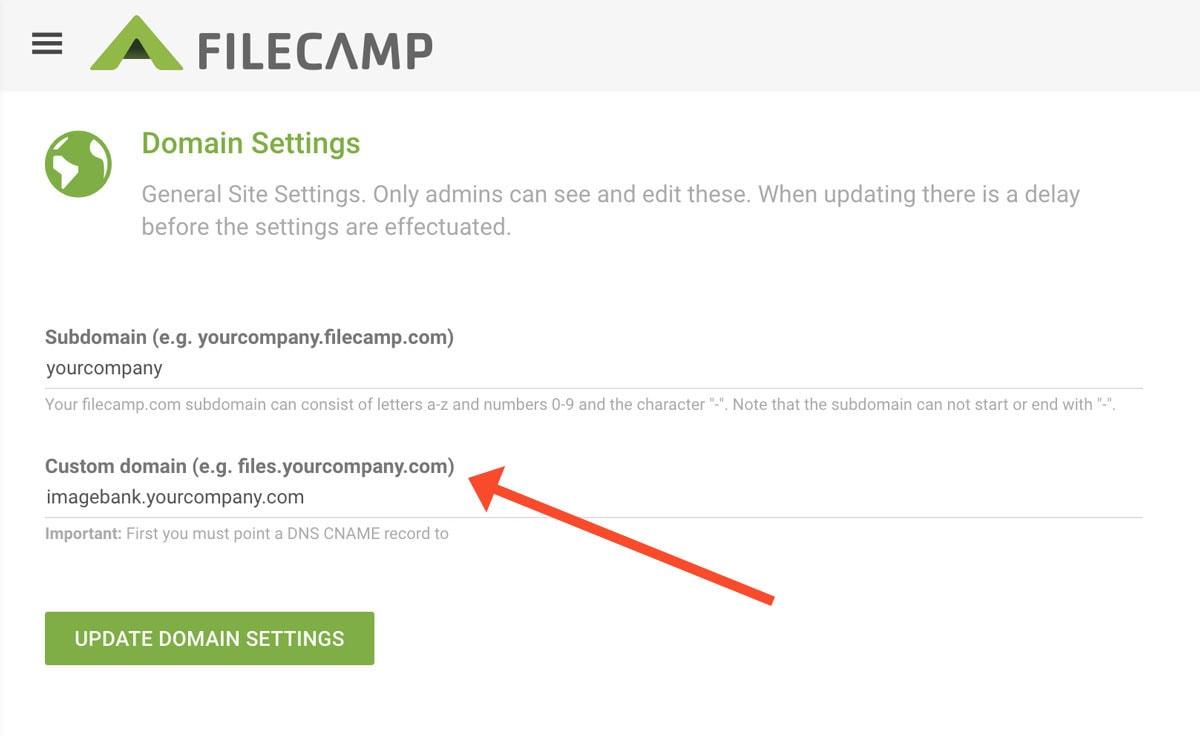
Add a custom domain name:
- Create a CNAME record on the service that is hosting your website (for example; imagebank.yourcompany.com).
- Login to your Filecamp account as an Administrator.
- Go to Admin > Domain.
- Enter your CNAME record (for example; imagebank.yourcompany.com) in the Custom domain name field
- Click UPDATE DOMAIN SETTINGS.
- Log out, wait 5 minutes, and log back into your own Filecamp URL.
P.S. Both your Custom domain name AND your default Filecamp subdomain name can now be used.
This article reviews the following topics:
OBS: Shared links to files and folders will no longer work when you change your site name (subdomain).
How to create a CNAME record
Each hosting service has slightly different ways to create CNAME records. But here are some general guidelines:
1. Log in to your account on your domain provider’s website
Look for the option to change DNS records. The option might be called something like DNS Management, Name Server Management, or Advanced Settings.
2. Create a new C-NAME record
Point the CNAME record from your subdomain (shown in the Hostname field in the example below) to your Filecamp subdomain (shown in the Target field).

The UI and terminology may vary depending on your registrar, but the concepts are the same.
3. Check the C-NAME record
You can check your CNAME record using an online DNS checker, such as:
CNAME Lookup - MxToolbox
Please note that DNS changes can take up to 48 hours to propagate, although they are usually effective almost instantly.
4. Make the connection
The final step is to assign your Custom domain name to your Filecamp account:
- Login to your Filecamp account as an Administrator.
- Go to Admin > Domain
- Under Custom domain you need to enter the CNAME record (e.g. imagebank.yourcompany.com)
- Click Update domain settings.
- Log out and log back in.